Initial Configuration of New Huawei OLT
Video Tutorial
Step-by-Step Manual
Configuration OLT Huawei MA56XX
Note:
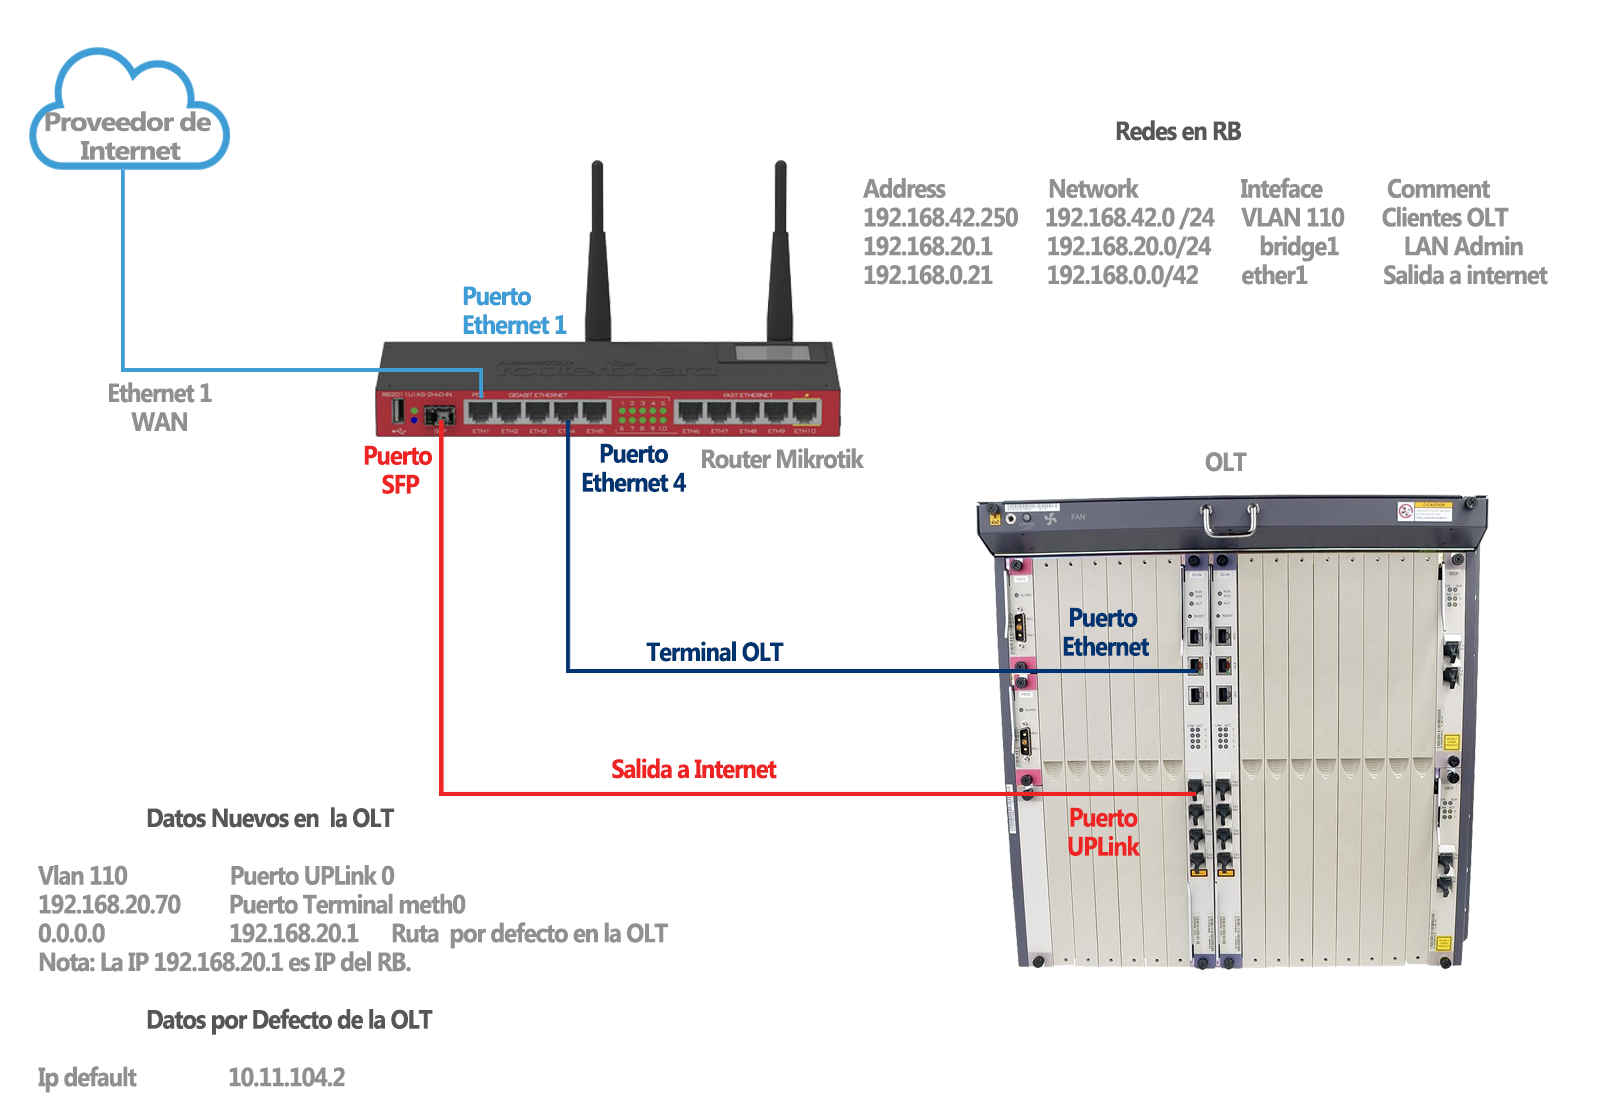
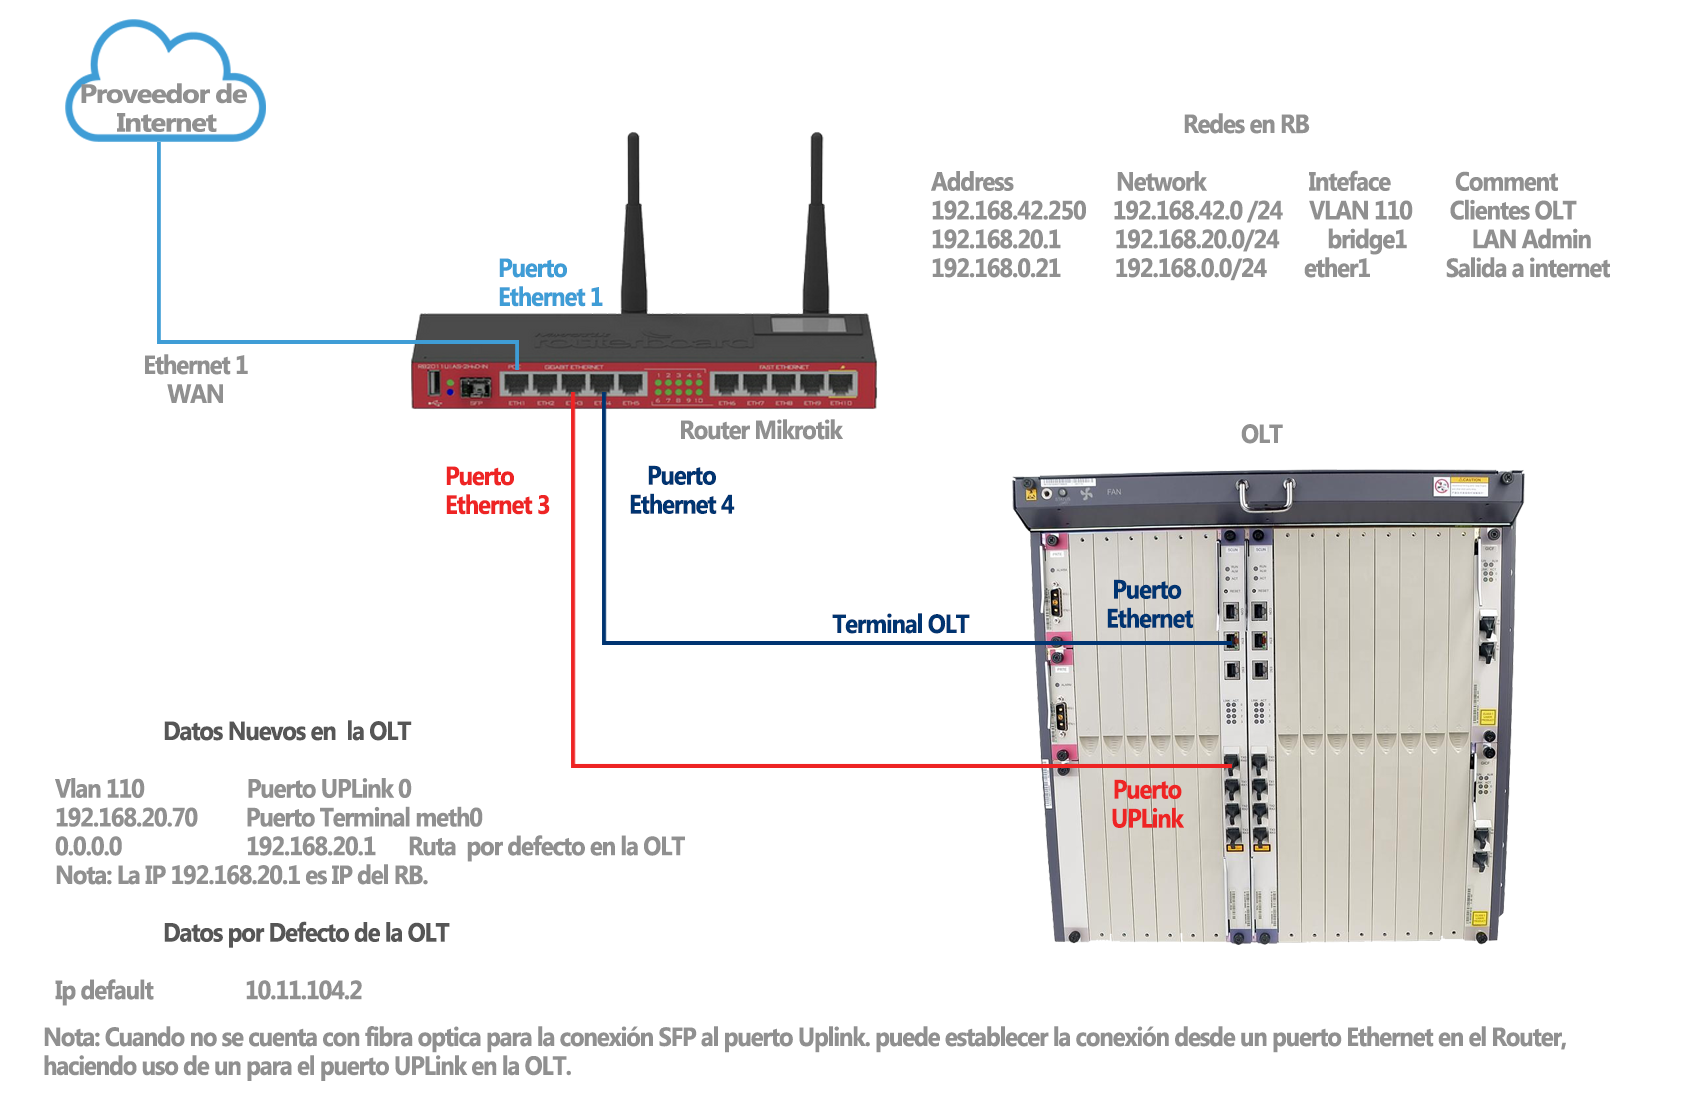
To have a clearer understanding of how the OLT connection is structured when performing the configuration, you can refer to the following two diagrams, with two scenarios on how to make the physical connection.
Scenario 1: Fiber Optic Connection
The diagram shows the physical connection to follow when using fiber optics for an SFP connection.
Scenario 2: Ethernet Port Connection
The diagram shows the physical connection to follow when not using fiber optics for an SFP connection, requiring the use of an adapter at the UPLINK port's entry.
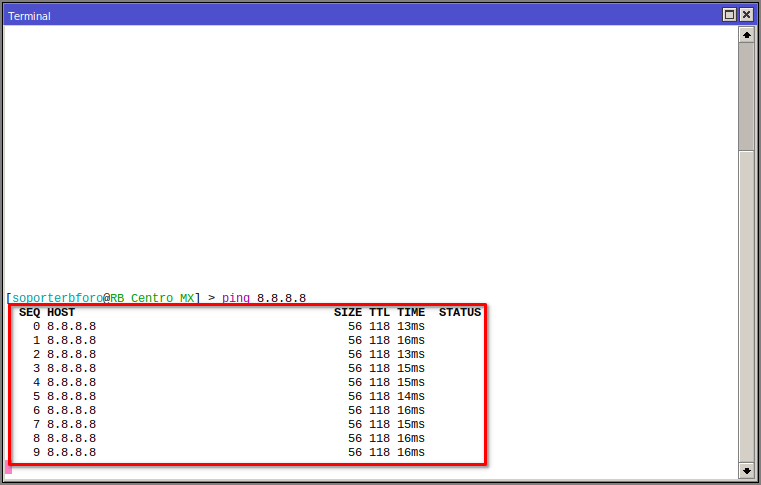
1 We must check that we have internet access
2 We must have our Vlan, Management LAN, and Customer Segment LAN added
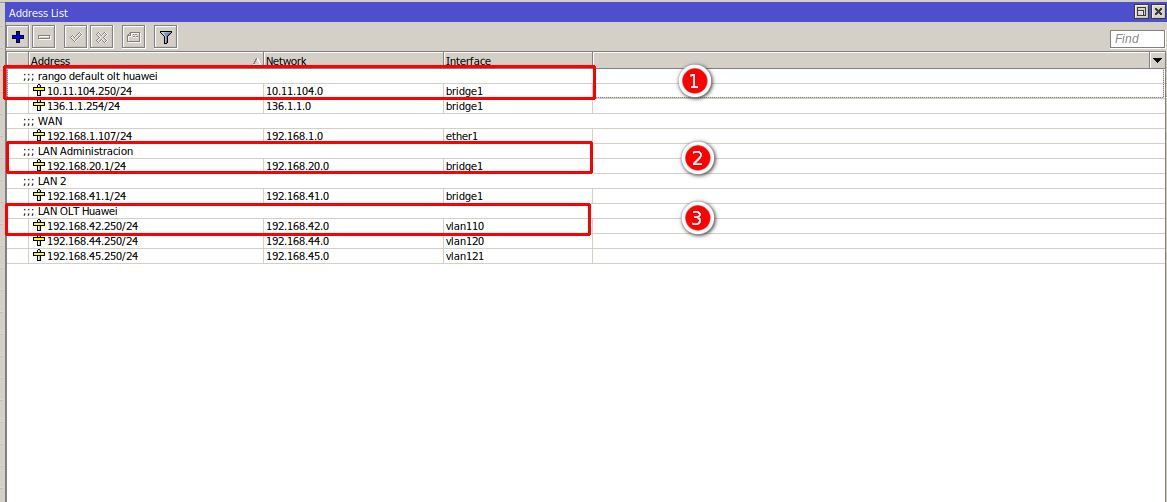
- 1.- We add the default OLT segment: 10.11.104.0/24 so that the Mikrotik can communicate with the OLT
- 2.- We add the OLT Administration LAN which is: 192.168.20.0/24, later we will assign the IP 192.168.20.70 to the OLT
- 3.- We add the VLAN and assign our Network Segment for the ONUs: 192.168.42.0/24 (SFP port or Ethernet port as appropriate)
3 We must test the connection with the OLT using the default assigned IP

4 Enable the Telnet service, only applicable for the MA5800 series
Note:
To enable the telnet service, follow these steps:
4.1 Access via SSH using the OLT's default credentials.
    /system ssh 10.11.104.2 user=root
    admin123
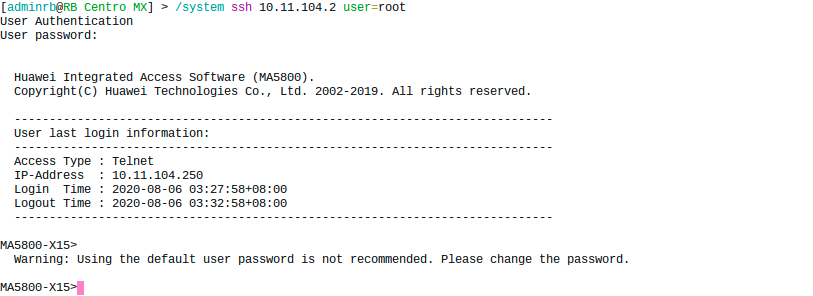
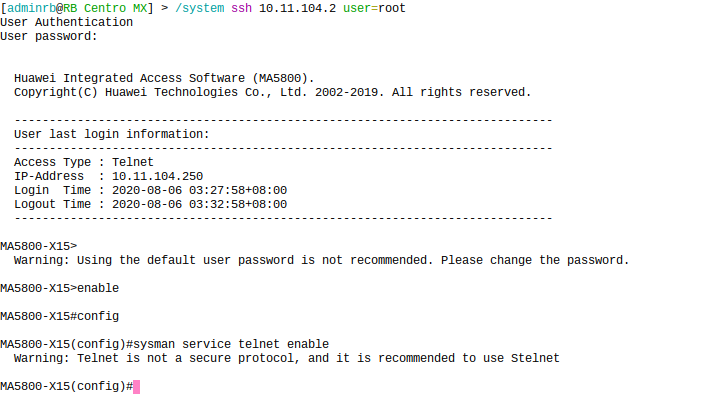
4.2 Enable Telnet.
    enable
    config
    sysman service telnet enable
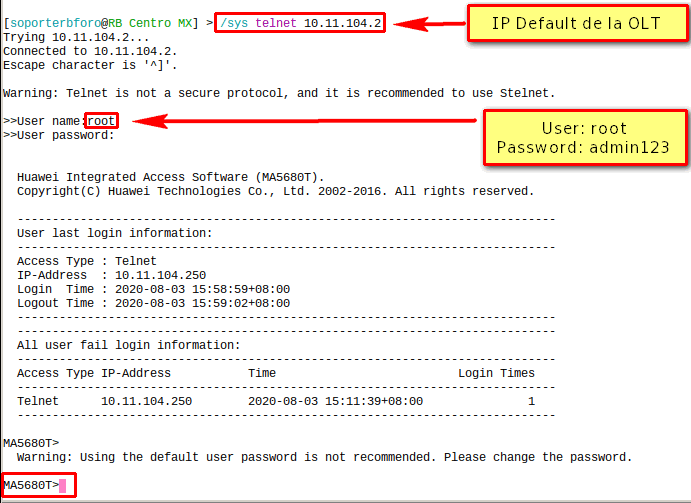
5 Connect via telnet with the Default IP
    /sys telnet 10.11.104.2
    root
    admin123
6 Now we can view and confirm the detected OLT boards.
    enable
    config
    display board 0
7 Confirm all boards
board confirm 0
8 Configure the new IP for the OLT
    MA5608T> enable
    MA5608T> config
    MA5608T(config)# interface meth0
    MA5608T(config-if-meth0)# ip address 192.168.20.70 255.255.255.0
This will take us out of the terminal and define the network in the mikrotik IP address.
9 Now we can connect with the new IP. For this, we will use the following command.
/sys telnet 192.168.20.70
10 Once the connection is established, we will proceed to configure the default routes.
    MA5608T> enable
    MA5608T> config
    MA5608T(config)# undo ip route-static 0.0.0.0 0.0.0.0
    MA5608T(config)# ip route-static 0.0.0.0 0.0.0.0 192.168.20.1
    MA5608T(config)# save
11 Now we will create a user, using the following commands.
    MA5608T> enable
    MA5608T> config
    MA5608T(config)# terminal user name
    user
    password
    Level: 3 # administrator
    Connections: 4
Password Change:
12 Change the root user's password
    MA5608T> enable
    MA5608T> config
    MA5608T(config)# terminal user password
    root
    admin123/old_password
    new_password
Note:
April 12, 2024, 3:32 p.m. - Visitas: 98284
